
Why Replacement Day Looks Like Controlled Chaos
If you've never had a roof replaced before, the morning the crew shows up can feel like a lot all at once. Trucks pull in early, a dumpster or trailer gets staged in the driveway or yard, and within an hour there are people on ladders and material being carried up to the roofline. For homeowners across the Kansas City metro, this is simply how the work gets done in the time it takes.
Understanding the order of operations ahead of time takes a lot of the stress out of the day. There's a reason tear-off happens before anything else, a reason the decking gets checked before underlayment goes down, and a reason cleanup isn't just sweeping at the very end. Each step protects the one after it, and knowing the sequence helps you understand what the noise outside your window actually means.
Why the Sequence Matters
A roof is a layered system, and each layer depends on the one underneath being sound. Skipping steps or doing them out of order is how leaks and premature failure happen years down the road, which is why a professional crew follows the same sequence on almost every job regardless of the shingle type or roof pitch.
Tear-Off Comes First
Before anything new goes on, the old shingles, underlayment, and any exposed flashing have to come off completely. This isn't optional on most jobs since roof-over installs hide problems in the decking that only show up once the old layer is gone. Crews work section by section, stripping material down to bare wood.
Once the decking is exposed, it gets checked board by board for soft spots, rot, or delamination. Any section that doesn't pass gets cut out and replaced with new plywood or OSB before the crew moves forward. This is the step that protects everything that goes on top of it for the life of the new roof.
Drying In the Roof
Once the decking is solid, underlayment goes down across the whole roof as the first layer of water protection. In valleys, around chimneys, and along the eaves where ice and snowmelt tend to back up in Missouri winters, an ice and water barrier gets added for extra protection before the rest of the underlayment is rolled out.
Drip edge gets installed along the eaves and rakes next, giving water a clean path off the roof instead of under it. Flashing goes in around any chimneys, vents, or skylights at this stage too, since flashing has to be tucked under the underlayment correctly to actually shed water instead of trapping it.
| Stage | What Happens | Why It Matters |
|---|---|---|
| Tear-off | Old shingles and underlayment removed, decking exposed | Hidden damage can't be fixed if it's covered up |
| Dry-in | Underlayment, ice barrier, drip edge, and flashing installed | This layer is the real water barrier, not the shingles |
| Shingle install | New shingles laid course by course, ridge capped last | Correct nailing and overlap prevent wind and water intrusion |
| Cleanup | Debris hauled off, magnetic sweep for nails | Protects kids, pets, and vehicle tires after the crew leaves |
What's Actually Installed on Top
With the roof dried in, the new shingles go on course by course starting at the eaves and working up toward the ridge. Each row overlaps the one below it by a set amount, and nailing pattern matters just as much as the shingle itself since under-nailed shingles are a common cause of wind damage down the line.
Ridge cap shingles go on last along the peak of the roof, covering the final seam and giving the roof its finished line. Any pipe boots, vents, or other roof penetrations get sealed as the shingles pass over them, and a final pass checks that every nail head is covered and every edge is tight.
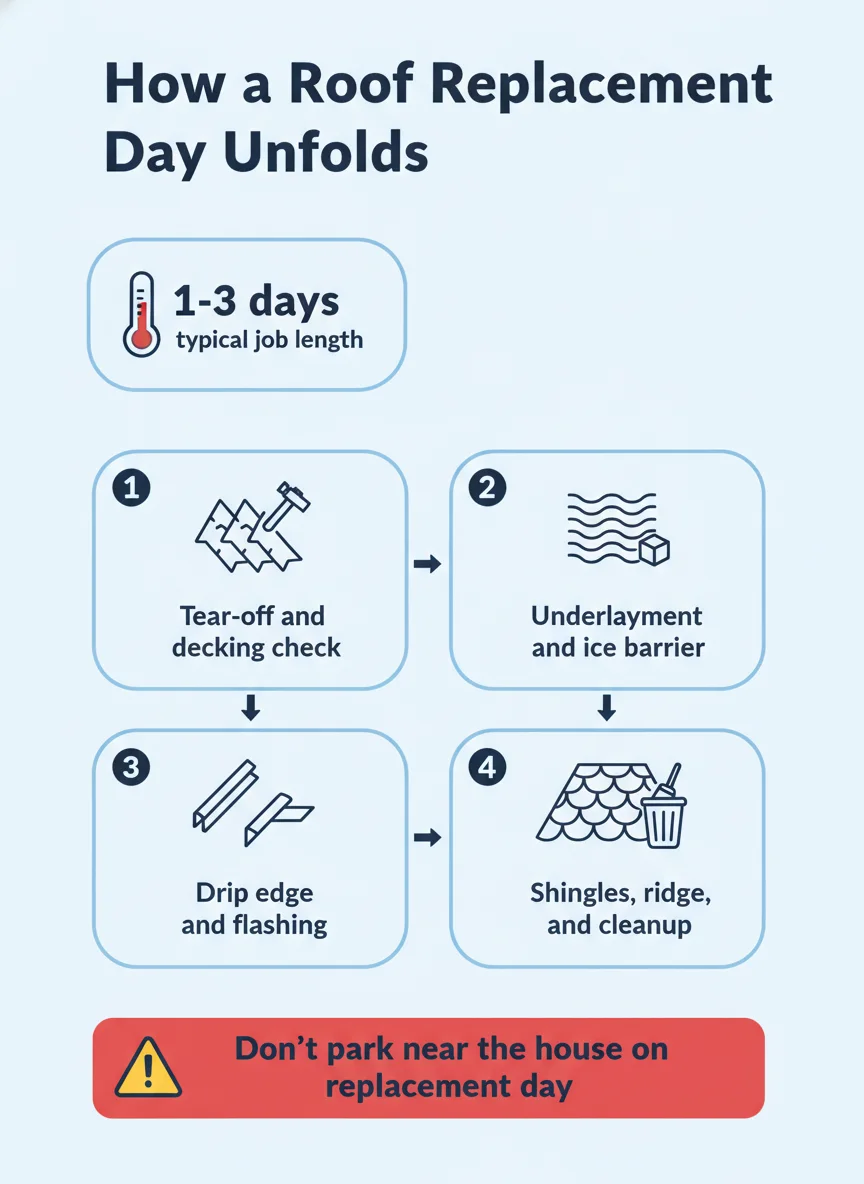
Step-by-Step: What Happens From Start to Finish
Here's the rough order a crew follows on a standard single-family home, though timing shifts with roof size, pitch, and weather.
- Material staged: Shingles, underlayment, and flashing get delivered and staged on the roof or in the yard before work starts.
- Tear-off begins: Old roofing material is stripped down to the decking and loaded directly into a dumpster or trailer.
- Decking inspected: Every section of exposed decking gets checked, and any damaged boards are replaced before moving forward.
- Underlayment and ice barrier: Water-resistant underlayment and ice barrier go down across the whole roof, with extra protection in valleys and eaves.
- Drip edge and flashing: Metal edging and flashing get installed around the perimeter and any roof penetrations.
- Shingles and ridge: New shingles are laid course by course, finishing with ridge cap along the peak.
- Cleanup and sweep: Debris is hauled away and a magnetic sweep checks the yard and driveway for stray nails.
What You'll See When the Crew Is Finished
A finished roof should look uniform from the ground, with straight shingle lines, a clean ridge, and no visible gaps or lifted edges. Flashing around any chimney or vent should sit flush and sealed, not just caulked over a gap. If you can safely view the roof from a window or ladder, these are the things worth a quick look.
Inside the house, check attic access points if you have them for any new daylight coming through, which would point to a missed seal somewhere. It's normal to hear some settling or temperature-related ticking from new material in the days after installation, but active drips or staining on the ceiling are not.
The Cleanup Standard to Expect
A thorough crew doesn't wait until the end of the day to deal with debris. Material gets bagged and hauled to the dumpster throughout the day so the yard doesn't end up buried in shingle scraps by the afternoon. Tarps and plywood sheets protect landscaping, AC units, and anything else near the house that could get hit by falling debris.
The magnetic sweep at the end is one of the more overlooked parts of the job, but it matters. Roofing nails that land in the grass or driveway can end up in a tire or a bare foot weeks later if they're not collected, so a slow, deliberate pass with a magnetic roller around the whole perimeter of the house is worth asking about if you don't see it happen.
What You Can Handle Yourself vs What Needs a Pro
Replacement day itself isn't a DIY project for the roof work, but homeowners play a real role in how smoothly it goes. Moving vehicles, securing pets, taking fragile items off walls, and covering outdoor furniture are all things you can and should handle the day before.
Everything from tear-off through the final nail belongs to a licensed, insured crew. Decking repairs, flashing details around chimneys and skylights, and correct shingle nailing patterns all affect how the roof performs in Missouri's mix of summer storms and winter ice, and mistakes there are expensive to find later rather than on the day they happen.
If you're not sure whether your home needs a full tear-off or could work with a roof repair instead, that's a conversation worth having before replacement day ever gets scheduled. A proper inspection beforehand sets the right expectations for how the day will actually unfold.
Knowing What to Expect Makes the Day Easier
Replacement day moves fast once it starts, but it follows a logical order from tear-off to dry-in to shingles to cleanup. Knowing what each stage looks like, and what to move or cover ahead of time, turns a loud, unfamiliar day into one you can plan around. Homes across Kansas City and Liberty go through this same process regardless of roof size or shingle style.
If you're weighing whether your roof even needs full replacement yet, it helps to read up on how long a roof typically lasts in Missouri before committing to a date. Signature Roofing walks homeowners through each stage of the process so there are no surprises once the crew pulls into the driveway.
Frequently asked questions
How long does a roof replacement take in one day?
Most standard homes in the Kansas City metro are torn off, dried in, and shingled within a single day, with cleanup wrapping up by evening. Larger or more complex roofs, or roofs with multiple layers to remove, can stretch into a second or third day. Weather can also push the timeline.
What should I move before roof replacement day?
Move vehicles out of the driveway and away from the house, and take down wall art, mirrors, or shelving inside that could shake loose from hammering. Cover patio furniture, grills, and pool equipment near the house since debris can fall farther than people expect. Pets do best indoors or offsite during active tear-off.
Will my yard be a mess after roof replacement?
There will be some debris and dust, but a magnetic sweep for nails and a tarp-and-plywood setup around landscaping keeps most of it contained. Crews bag and haul old material as they go rather than leaving it until the end. A final walk-around at cleanup catches what the magnet misses.
What happens to the old shingles and materials?
Torn-off shingles, underlayment, and flashing go straight into a dumpster or trailer staged on site for the day. The decking underneath gets inspected and any damaged sections get replaced before new underlayment goes down. None of the old material gets reused.
How do I know the new roof was installed correctly?
A final inspection after the shingles and ridge are set should confirm proper nailing, flashing at every penetration, and a clean ridge line. Ask your contractor to walk the roof's edges and valleys with you or show photos if you can't get up there yourself. Any gaps or loose material should be fixed before the crew leaves.